I have to tell you that I am trying to spend as little as I can to get this machine up and running. Not only do I not have a lot of disposable cash, but I'm not sure if this will be a lasting interest of mine, so I don't want to have invested a lot. I gotta say it has been hugely interesting so far and I learn stuff everyday about machining and tools, so that alone is really worth it.
When took the handpiece out and gave the chuck a spin it would only turn about one revolution before stopping. It turned easily, but I could feel a rough spot in the rotation of the bearings. Because of this I decided to try and upgrade the bearings.
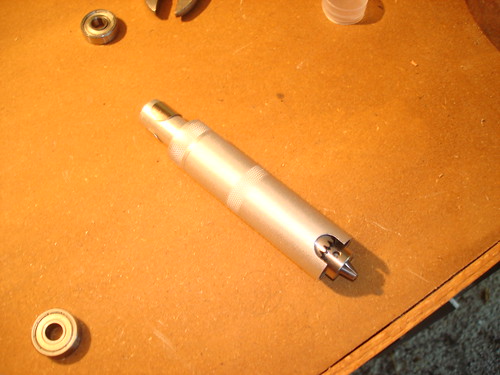
The handpiece looks like this.
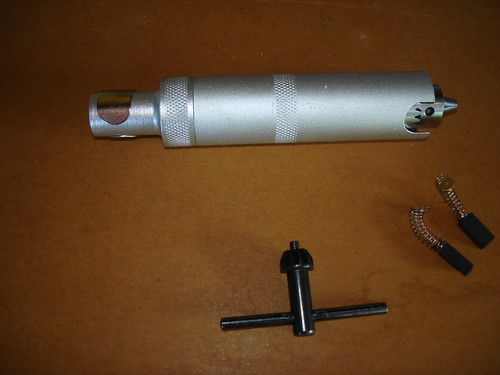
You can see the cute little chuck, the supplied key and a spare set of brushes for the 1/4 hp motor. I thought the brushes were a nice touch to include. The rear of the handpiece unscrews and this is what you have
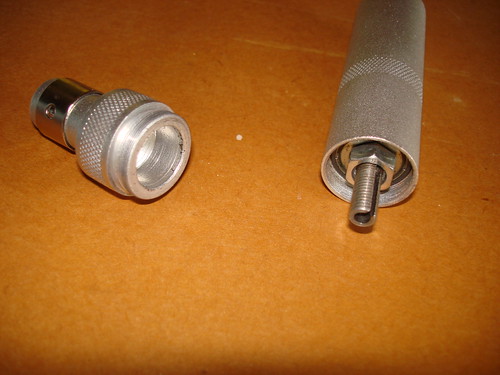
The nut is 12mm. I inserted the key into the chuck. It kept the shaft from turning and when I turned the nut the chuck very easily disengaged from it's taper mounting. This apears to be a Jacobs "0" taper. The chuck has JT0 etched into it. Here is the chuck removed.
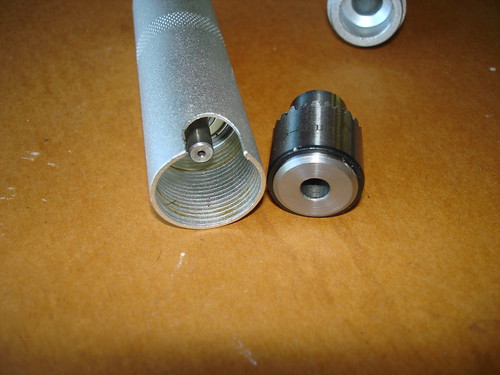
I placed the back end of the handpiece over a hole so the shaft would have someplace to go, then I tapped the spindle using a little piece of wood so as not to damage it. The shaft came right out. I could read the number on the bearing and saw that it was 608.
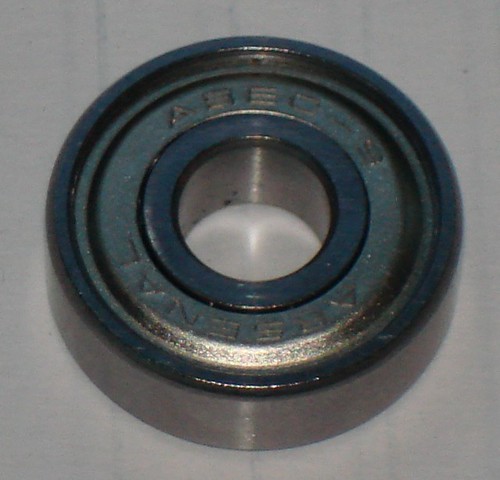
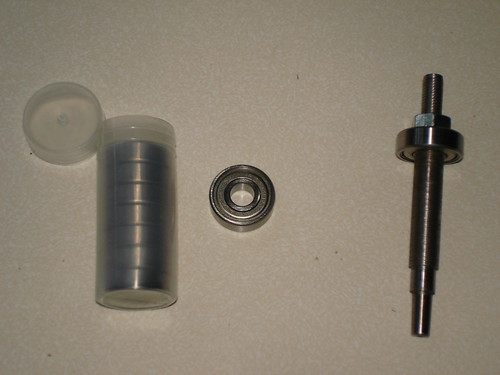
People familiar with bearings for inline skate wheels or skateboard wheels will recognize this size bearing. Since there are so many of these produces the price for new ones, (even high quality ones) is quite reasonble. I went to eBay and saw an auction ending in 18 minutes for 16 of the ABEC 9 versions of the 608 bearing which is used in the handpiece. They are made by ARSENAL. I got the set for $9.95 + $6.50 shipping which comes out to about $1.03 per bearing. That seemed like a good deal.
The ABEC number indicates the quality. I don't know what the stock bearing was but the number must have been low. As far as I know, 9 is the highest number, so these ABEC-9 bearings should be quite an improvement. Here is what I got.
When I took the Grizz handpiece apart there was one bearing which stayed on the spindle shaft(The other stayed in the handpiece tube.) Here it is next to my shipment of bearings. With 16 there is plenty of spares in case I get into this and start wearing them out.
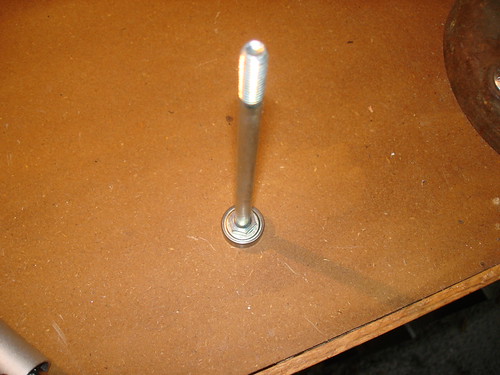
I was surprised at this point to find that when I turned the shaft while holding the bearing I could actually feel it "catch" in one spot in the rotation. I put the spindle shaft in the vice, and unscrewed the 12mm nut.
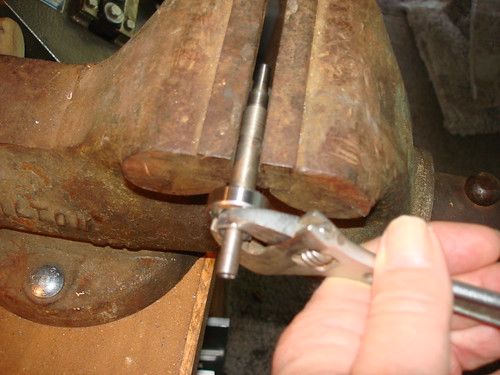
I was able to pull the old bearing off with my hand.

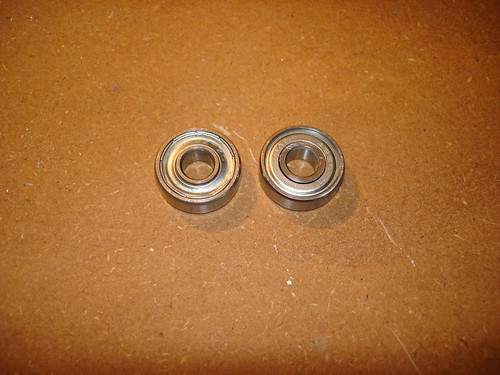
Here is a close-up of the old bearing on the left and the new precision one.
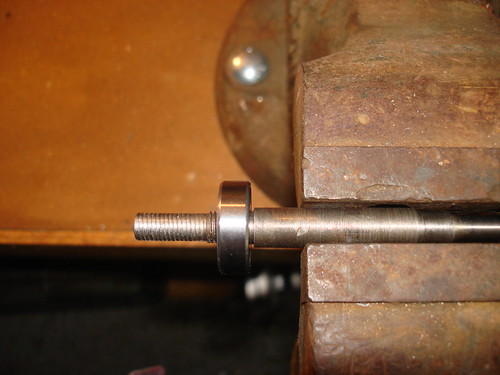
I could not quite push the new bearing on by hand as can be seen by the 1/16" gap between the bearing and the shoulder on the shaft.
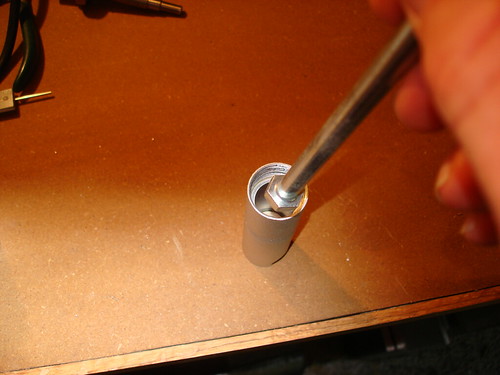
I needed to put the nut back on and seat the bearing by tightening the nut. It went on easily. The second bearing was too far down in the handpiece to reach, so I chose a bolt with a 1/2" head which was large enough to cover the inner race to use to push the old bearing out.
This I was also able to do by hand.
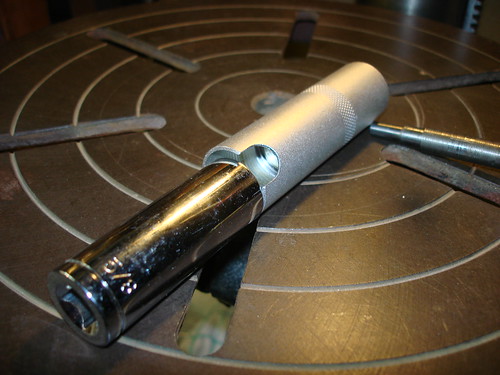
In seating the new bearing in the handpiece I thought I would be more carefull so that it didn't get cocked one way or the other on it's way in, so I chose a 5/8" deep-walled socket to push it into place with the drill press.
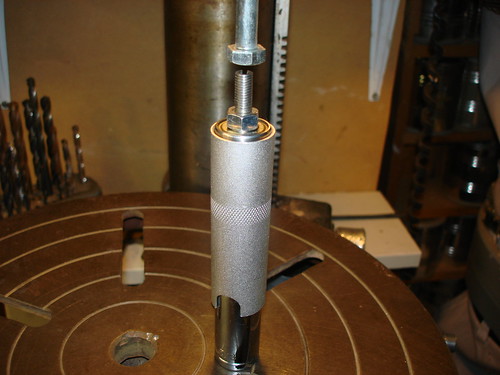
I used the drill press with the chuck closed to push on the socket and seat the bearing in the tube. I could probably have just pushed the socket with my hand it went in so easy. In order to seat this new bearing on the shaft, I set the handpiece on the socket to support the bearing inside the tube and chucked up the bolt. I then pressed the shaft and bearing in with the drill press.
It was all pretty uneventfull and totally worth doing. After the handpiece was assembled again
I found that if I gave the chuck a spin by hand it would spin for about 5 seconds as opposed to one turn. This was very gratifying. And it gave me something to focus on while I was waiting for the development of micRo at Lumenlab.
No comments:
Post a Comment